As I’ve mentioned before, I’m fascinated with some of the jewelry I’ve seen online that uses translucent polymer clay, especially when it looks like sea glass or glass glass.
After a lot of poking around for answers to how people like Kathrin Neumaier, Barbara Fernald and other clay artists, like those featured on The Blue Bottle Tree blog create their pieces, I had some idea of what to do, but was still a bit fuzzy about how to create the effects I was after. There were hints here and there, but nothing that really gave me the complete picture.
There were plenty of tutorials available for a price, but I had no way of knowing whether they would tell me what I wanted to know.
It was time to set up the la-bOr-a-tory (mwah, ha, ha!) and try some experiments.
What I tried (this time around)
Of all the techniques I saw, the most appealing seemed to be the ones where you could make a bead core of a clay or dough type substance from ingredients around the house. Later you dissolve the core, leaving behind the hollow bead.
Since translucence is a key concept here, having a removable core makes the most sense.
Sounds simple, right?
One resource, Glass Attic: Polymer Clay Encyclopedia, has a page full of possibilities. Since their main categories seem to revolve around cornstarch (or lack of it), that seemed like a good place to start.
Cornstarch eco packing peanuts
I wanted nice smooth, rounded beads, for the most part. If left the pellets dry, I’m stuck with their not-so-attractive shape. If I wet them, I get a gluey, unmanageable mess.
I can see how they’d be easy to remove after baking, since they dissolve quickly, but am not sure how to mold them into the desired shape before baking.
Cornstarch, baking soda and water
This seemed obvious to me later, but at the time all I had were the names and amounts of the ingredients and no mention of cooking them. When I mixed everything together, a really interesting substance developed. It could be shaped into a ball, but seconds later, if you let it rest in your hand, it would collapse into a puddle. Oops!
I’ll be revisiting this idea in a later post.
Cast paper
I’ve worked with this quite a bit and had some pre-made pulp, so it seemed like a workable option. I know that it dries to a tightly packed shape. I did have some concerns about smoothness, but it was worth a try.
Papier maché clay
I also has a batch of this clay mixed up. It seemed like it might be the answer to the smoothness issue of the cast paper, because of its finer texture.
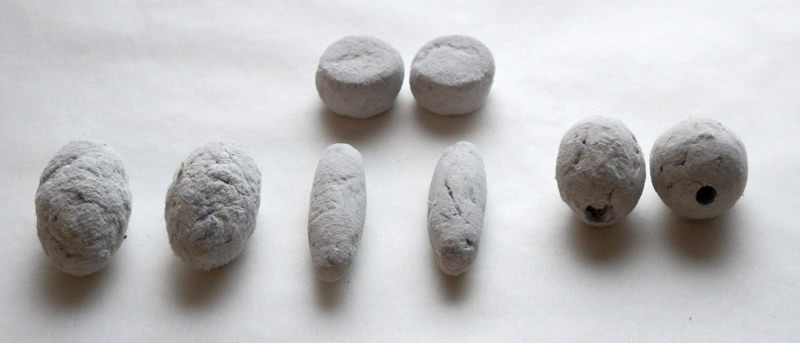
So, variations on a paper theme won. I formed several differently-shaped beads, pierced them through at the ends and left them to dry.
What I didn’t try and why
A few candidates were crossed off the list before making it to the tryouts…
Some possible cores like vegetables, eggshells (even though I have an overabundance from 7 hens) and beeswax (also plentiful) just seemed either wasteful, confusing as to how to put to use or messy (in order of appearance).
Foil seems moldable enough, but not very easy to control or smooth. I also couldn’t envision how to get it out later. It’s probably useful to reduce the weight of larger opaque beads.
Results
Some heartache, some hope.
Paper pulp
As you can see above, it’s pretty lumpy and doesn’t get any smoother as it dries.
I did try sanding it, which seemed reasonable until there was fine fuzz everywhere.
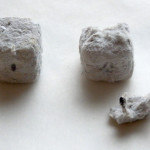
Bead cores made from this also broke apart very easily.
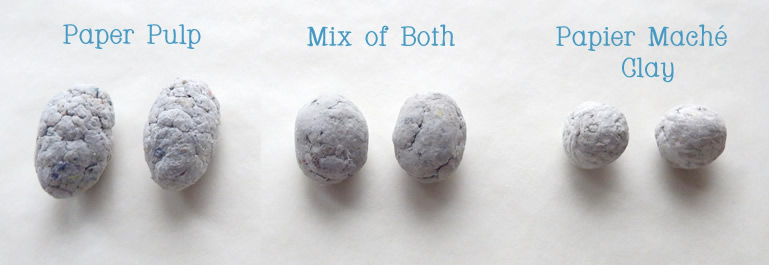
Mix of paper pulp/papier maché clay and papier maché clay only
It was difficult to tell these two types of core apart (see the intro photo above). They reacted the same way.
They could be smoothed while forming the bead and sanded easily after, the same as when I make bowls with them.
I know from working with bowls that they’ll start to fall apart when wet. How long it’ll take is another question. There may be hope yet.
What’s next?
Now it’s time to color some polymer clay to wrap around them, bake then see what it’s like to get the cores out.
I’ll be trying these paper variations and later have another go at the cornstarch and baking soda clay.