Oh! There was once such hope.
Once the cast paper and papier maché clay cores I made for the hollow polymer clay beads were dry, they needed to be baked and hollowed out.
Little did I know what was waiting inside those pint-sized troublemakers.
Prepping
The translucent polymer clay (Sculpey III) was colored with alcohol inks made from Sharpies and rolled out to about 1/8″ (.125 cm).
Wrapping
Wrapping the polymer clay around the cores was a surprising experience. It didn’t really want to fit snugly.
The only way I can think of to describe it is that the clay “ballooned out” away from the core (almost like a magnet resisting the “wrong” end of another magnet).
Air seemed to get trapped under the surface, even though I did everything I could think of to prevent it. The cores were very dry. They had sat for days in winter heating. It’s hard to believer that moisture was the culprit.
In a way, I wasn’t particularly worried, since it seemed like it might make hollowing the bead easier later. But it was a bit tough to control the shape. It would thin in some spots and get floppy.
Baking
I wasn’t sure about the temperature and baking time, since I was using a relatively thin layer and didn’t know how the core material would affect the heat distribution.
So I thought the package directions were a good place to start (275ºF/135ºC for 15 minutes). If I ran into a problem, I figured I could adjust from there. That seemed to work out fine.
Hollowing
Now comes the fun part…

The beads soaked in a bowl of water for a few hours. Then, being impatient to see results, I started poking through the holes with a pottery needle tool.
The core materials were fairly tightly packed and needed to be broken up some to let more moisture into the core.
Leaving them by the kitchen sink tempted me to poke at them every time they caught my eye. And poke, and poke and poke, until my fingers got prune-y.
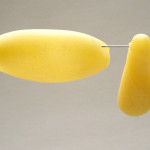
This took a very, very long time for less-than-stellar results. Some of the beads are usable, but as for others… Take a look at the photos below.
Lessons learned
Make your core smaller than you think it should be
Keep in mind, that by adding the polymer clay on top of it, you’re increasing the size. Otherwise, you’ll get a much larger bead than you bargained for.
Use a finely-grained, smooth material for the core

Lumpiness makes the clay cling to the inside, making it hard to completely remove.
Since the clay is translucent in this case, that means you can still see bits of the core inside (or may spend precious hours of your life obsessively picking it out).
It also makes getting the material out of the bead more difficult. Big pieces don’t want to come out of a small opening.
Use something other than paper as the core material
This was just too much time and effort for too little payoff. Mixing the core material, shaping the core and forming the polymer clay are all expected parts of the process. But all the digging it took to empty the beads wasn’t really worth it.
Good to know.
Try to keep an even thickness of clay near the opening of the bead.

The tendency is for the clay to get thinner near the ends.
The area weakens where it needs to be strongest, to survive all the poking, prodding and scouring that it takes to clean the little devils out.
Determine whether making the beads hollow will make much difference in their appearance.
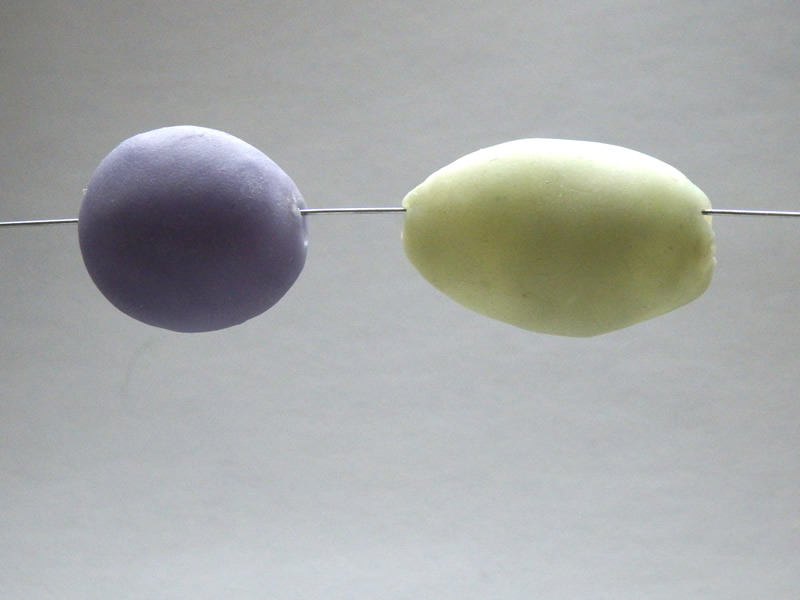
Hollowness had the greatest impact when the color was light. For the darker colors, like purple (see the intro photo, above), you can barely tell the difference between a solid and a hollow bead.
I’m a big fan of the frosted look, and love to see the light through a bead, but in most circumstances, a piece of jewelry won’t be hanging in precisely the right lighting to showcase this subtle level of translucence. It’ll be hidden by hair or against skin or clothing. You’ll need to decide just how much you like it.
I’ve recently learned that much of the glassier look of some artists is achieved with liquid polymer clay. That’s for another day’s tales of trial and error.
Next on the experimental to-do list
Still determined to make this work, I’ll be revisiting the land of cornstarch and baking soda… with some stovetop heat this time : )
Then there’s the liquid translucent polymer clay and a few other wild-eyed ideas floating in and out of consciousness in the wee hours.